Showing posts with label whole wheat. Show all posts

Sunday, February 17, 2013

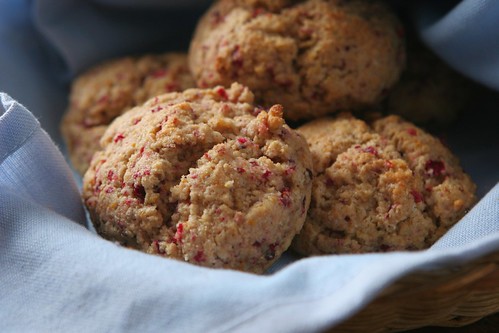
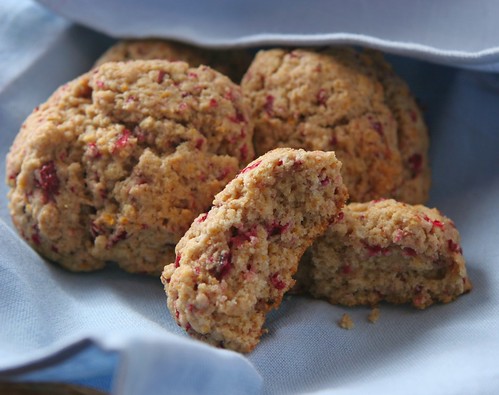
Meyer lemon cranberry scones

IMG_1153

Wow, it has been a long time since my last post...I've been cooking a lot but haven't really been inspired to blog about any of it. But I was recently reminded of how nice it is to share recipes and food stories with others and it made me want to get back here and post something. And between the snowy weather this weekend and the fact that I've been down with a cold, I've been spending a lot of time on the couch paging through cookbooks and bookmarking recipes. I've got quite a list of things I want to try in the next couple weeks, and hopefully some of the recipes will be good enough to share!

I don't know about you, but snowy days make me want to bake. The apartment just seems extra warm and inviting when it is filled with the scent of baked goods. I came across this recipe when I was looking for something to bake using the Meyer lemons that I recently bought. If you haven't tried them, Meyer lemons are sweeter and more aromatic than regular lemons. They're only in season for a few months, so I try to grab them when I see them. The Meyer lemons work beautifully with the cranberries in these scones. The scones are fragrant and light, and have just the right amount of sweetness to offset the tart fruit. They're perfect for breakfast or as an afternoon snack with a cup of tea.

IMG_1137

Monday, August 20, 2012

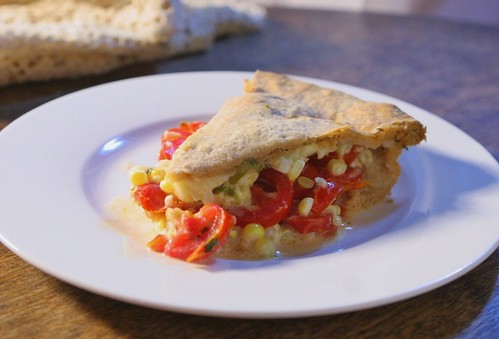
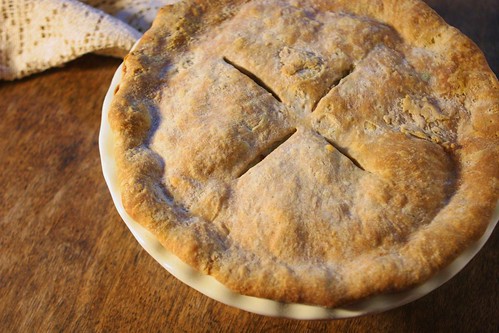
Tomato and corn pie

IMG_9202

I generally feel that summer is a time for simple food. Life moves at a leisurely pace during the summer months (relatively speaking), and the seasonal produce doesn't need a lot of manipulation to taste awesome. But every once in a while, I get the urge to make something elaborate, something that will show off summer vegetables in a special way. This tomato and corn pie does just that. I have actually been wanting to make this recipe since 2009, ever since it was posted on Smitten Kitchen. Somehow three years went by, and  though the recipe crossed my mind often, I never got around to making it. I finally got my act together and gave it a try this past weekend, and I can't believe I waited this long! This recipe combines fresh tomatoes and corn with herbs and cheddar cheese, and encases it all in a flaky crust. It's really wonderful, ideal for a special summer dinner. I'd say it's perfect to serve to guests, except for the fact that you're not going to want to share...

IMG_9161

Thursday, May 17, 2012

Samosa galette

IMG_4801

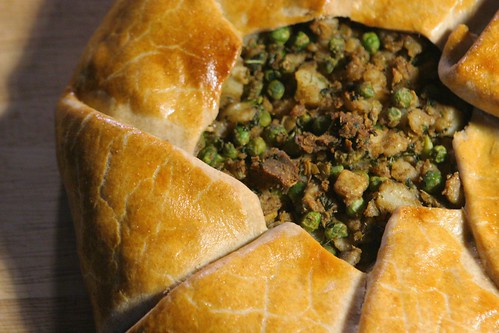
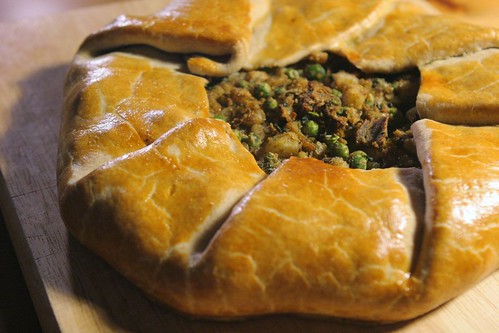
Samosas. One of the most popular Indian foods out there, yet one of the few things that I've never seen my mother make from scratch. She is an excellent cook, but I guess she always felt that it was easier to buy samosas than make them at home. I decided recently that I wanted to try at least once to make samosas from scratch, and found a recipe in my favorite Indian cookbook. However, as I was reading through the recipe, I started to realize that filling and shaping 20 individual samosas would be lot of work and that maybe store-bought is the way to go with samosas after all. But instead of giving up entirely, I decided to make one big galette with the traditional samosa filling, instead of shaping all of the individual pastries. It came out awesome - all the goodness of traditional samosas, but much easier to make!

IMG_4808

Thursday, May 10, 2012

Whole grain pancakes with macerated blackberries and Earl Grey whipped cream

IMG_4765

I have a confession to make. There was a time when I didn't really like brunch food. When I'd go out to brunch with friends, I'd be the person ordering a turkey sandwich when everyone else was enjoying pancakes or omelettes. Happily though, I started to appreciate the merits of brunch food when I was in college. And now, nothing makes me happier than Eggs Benedict, or bagels with lox, or of course, pancakes.

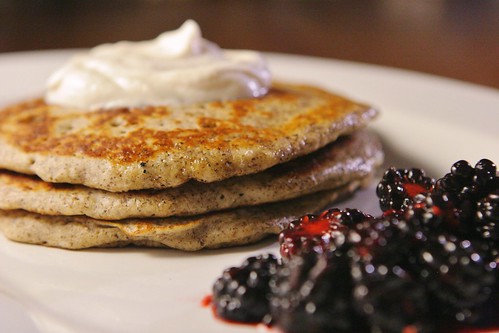
I'm super excited to share this recipe with you. I don't have many breakfast/brunch recipes on the blog, but starting with this recipe, I'm going to change that. These pancakes are adapted from Heidi Swanson's wild rice pancakes in Super Natural Cooking - I always use buckwheat flour instead of wild rice flour, and I love how the pancakes taste. They have a more complex flavor than traditional white flour pancakes, and pair really well with the macerated blackberries and Earl Grey whipped cream. The idea of infusing whipped cream with tea was inspired by a recent issue of Bon Appetit, and I decided to use Earl Grey because I really enjoy the flavor of bergamot. When I told Andrew about the Earl Grey idea, he suggested that blackberries would be a good pairing, and he was absolutely right. The three components of this dish blend together beautifully to make an elegant dish that would be a great choice for a Mother's Day brunch.

Tuesday, April 3, 2012

Beet pizza with arugula pesto and Gorgonzola cheese

IMG_4382

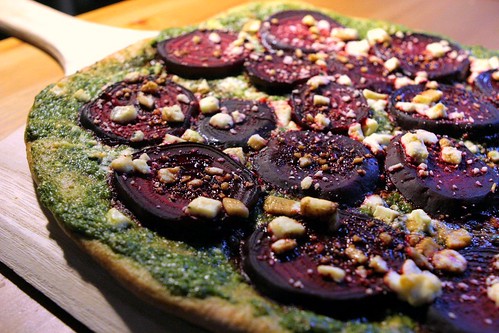
For some reason, I've been seriously craving pizza lately. I made a classic tomato and mozzarella version last week, and wanted to experiment with something more interesting next. I had the idea to turn a classic beet salad into a pizza and decided to use Gorgonzola instead of the more common goat cheese (I love me some moldy cheese). I know I wanted to incorporate arugula, but didn't really just want to pile it up on top of the pizza. I mean, is there any good way to eat pizza with a huge pile of leaves on top without having them all fall off? I was also looking for a way to add moisture to the pizza and decided to kill two birds with one stone by making an arugula pesto to use as pizza sauce. I enjoyed the way the final pizza came out - the different components definitely worked well together to make a tasty pie. My pizza craving isn't gone though, and I've got more pizza dough in the freezer...so what toppings should I play with next??

Beet pizza with arugula pesto and Gorgonzola cheese
Makes a 16-inch pizza

Some tips: I like to form the pizza on a piece of parchment paper placed on the pizza peel. That way, the pizza and parchment slide easily into the oven. Also, if you don’t have a pizza stone, you can bake the pizza on a large baking pan.

This recipe makes more pesto than you'll need for the pizza. You can eat the leftovers with pasta or as a sandwich spread, and you can freeze it if you want to store it for a while.

1 lb. pizza dough (I used whole wheat), at room temperature
3 medium beets (about 20 oz.), scrubbed and stems trimmed to 1 inch
2 cups arugula leaves (packed)
⅓ cup walnuts
⅓ cup coarsely shredded Parmigiano-Reggiano cheese
¼ cup extra-virgin olive oil
Salt
Freshly ground black pepper
½ cup Gorgonzola cheese, crumbled (you can also use any other type of blue cheese, or use goat cheese if you prefer)
4 tsp balsamic vinegar

Preheat oven to 350 deg F. Put beets in a baking dish with enough water to cover the bottom of the dish to a depth of 1/8 inch and sprinkle with salt. Cover tightly with foil and bake the beets in the preheated oven until they can be easily pierced with a sharp knife, about 1 hour (this could take more or less time, depending on the size of the beets). Remove beets from the oven, uncover the pan, and cool the beets. Cut off their tops and roots and rub off the skins. Cut beets into ¼-inch slices.

If you have a pizza stone, place it on the bottom rack of the oven. Increase oven temperature to 500 deg F (or as high as your oven can go).

While beets are baking, combine arugula, walnuts, and cheese in the bowl of a food processor and process until coarsely chopped. Add olive oil and process until smooth. Season to taste with salt and freshly ground black pepper.

When oven is heated to 500 deg F, stretch dough out to a 16-inch round on a pizza peel. Spread arugula pesto on dough and top with beet slices. Sprinkle cheese crumbles over the beets. Slide pizza onto the preheated stone and bake until crust is crisp, about 8-10 min. Remove pizza from oven and drizzle balsamic vinegar over the pizza. Let cool for a couple minutes, and serve.

Monday, November 7, 2011

Delicata squash cinnamon rolls with maple glaze

IMG_2673

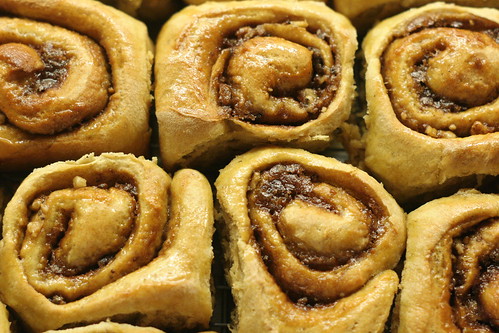
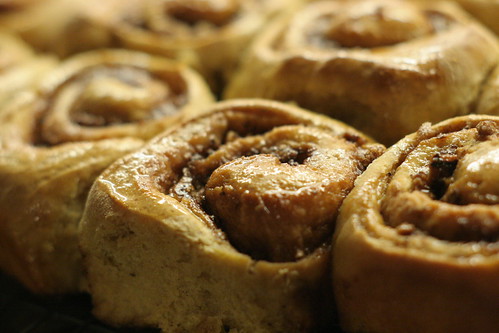
The November issue of Cooking Light has a feature on winter squash, with some of the coolest recipe ideas I have seen in a while. It definitely inspired a full on squash obsession for me. As evidence - after I read the magazine, I went out to the farmers' market and bought 7 squashes, and only 2 of them made it through the weekend without being cooked. Honestly, I haven't been this excited about squash since I was an infant! (apparently it was my favorite baby food). Anyway, I thought these cinnamon rolls were such a fun way to use squash. If you're thinking that baking with delicata squash is weird, just remember that it is essentially the same as baking with pumpkin. The pureed squash adds sweetness and moisture to these rolls, which are deliciously spiced and drizzled with a maple glaze. They are great for dessert as well as breakfast.

IMG_2647

Do you ever make baked goods with winter squash?

IMG_2652

Wednesday, September 28, 2011

Gorgonzola-apple quiche

IMG_1663

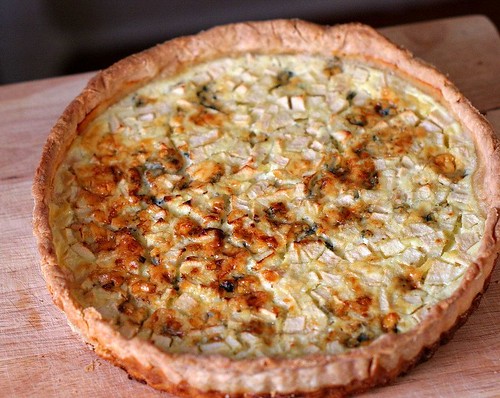
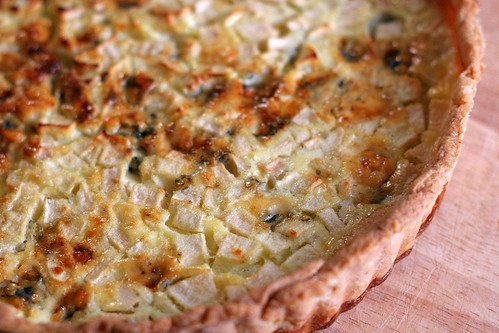
I love apples. When I was a kid, my dad would let me pick out 5 or so items (anything I wanted) from the supermarket as incentive for keeping him company while he did the grocery shopping, and a bag of apples was always in my top 5. I realize now that I was a really weird good kid - I can only hope that my future children will be just as good at choosing healthy food over junk! Anyway, fresh apples is one of the things I love most about fall in New England. So many varieties to try, each with unique flavors. Last weekend, after I picked up several pounds of apples from the farmers' market, I realized that I'd never get through them all unless I started cooking with them in addition to just eating them plain. This Gorgonzola-apple quiche from Dorie Greenspan's Around My French Table was the first recipe that caught my eye. I love the combination of Gorgonzola cheese and apples in salads and now I can report that it works just as well in quiche. The quiche really was lovely - very tasty, though not quite traditional, with chunks of sweet-tart apple, salty cheese, and sweet onions. It only used up one apple though...I might have to make it a few more times to get through the rest of the ones I bought!

Do you have any savory apple recipes to share?

IMG_1684

Monday, September 5, 2011

Whole grain blueberry buckle

IMG_0786

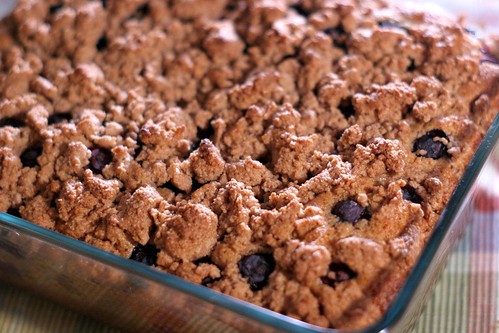
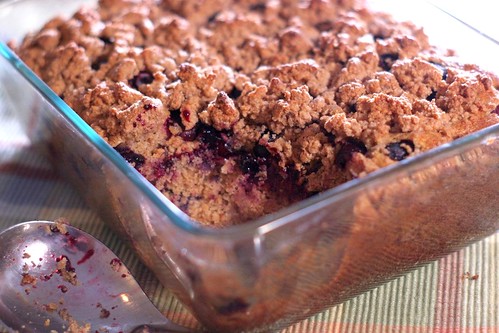
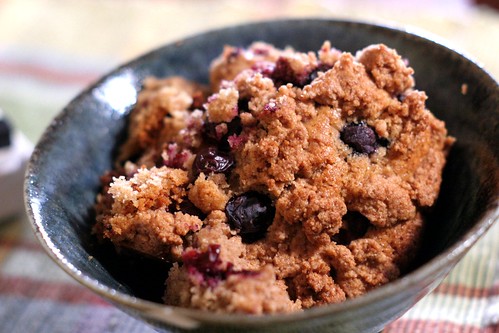
My lab group recently went on a crazyawesome retreat to New Hampshire, and one of the things we did there was blueberry picking at Berry Knoll farm. The blueberries at the farm were some of the best I have ever tasted, and I came home with about a quart of them. I saved half to eat with yogurt and granola for my breakfasts this week, and started looking for a recipe to make with the other half. I decided to make something from Good to the Grain and ended up choosing the blueberry buckle. It's a nice thick cake with two layers of blueberries, and a crumb layer on top. The cake and crumbs are made with whole wheat pastry flour and spelt flour. The cake has great flavor and texture - Kim Boyce's recipes are awesome! We ate some of it for dessert tonight but it is really more of a breakfast cake...mmmm, I can't wait to eat some tomorrow morning =)

IMG_0799

IMG_0847

Sunday, August 21, 2011

Corn bread with fresh corn and bacon

IMG_0549

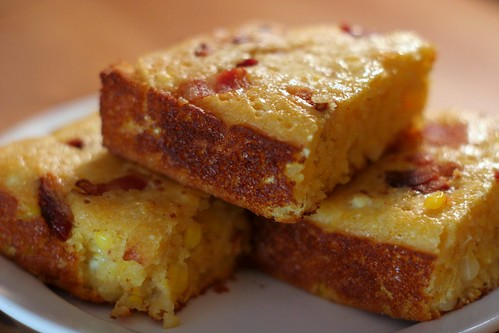
I first saw this recipe over at Pinch My Salt earlier this week. It looked amazing, and I couldn't believe that this recipe came from The Bread Baker's Apprentice - I've had this book for over a year, and I never noticed this recipe in there. Once I knew about it though, I couldn't wait to make it. I picked up several ears of super fresh corn at the farmers' market this morning and decided to make the bread right away. I wanted to make it for dinner tonight, so I wasn't able to soak the cornmeal overnight as the recipe instructed. The bread was still wonderful though, packed with fresh corn kernels with lots of bacon on top. I've come to expect great things from recipes in The Bread Baker's Apprentice, and this definitely didn't disappoint. If you've got access to some fresh local sweet corn, this is a perfect way to use it.

Sunday, May 22, 2011

Whole wheat chocolate chip cookies


A couple weeks ago, Andrew and I went to the New England Mobile Book Fair, which is an awesome discount book store. The cookbook section is the biggest I have ever seen, so naturally I was in heaven. Especially when I found out that some of the cookbooks were on sale for 40% off. I came home with the Flour bakery cookbook, Dorie Greenspan's Around My French Table, and Kim Boyce's Good to the Grain (believe me, it took a lot of effort to pare down my selections to just those three). I'll be doing posts about all these books as I try them out, but for today, I'm focusing on Good to the Grain. I have heard a lot about this book, which has earned rave reviews from some of my favorite food bloggers. The book focuses on baking with whole grain flours, which is a topic that gets very little attention in other cookbooks. Different grains have a great variety of flavors and textures that can add a lot of baked goods, as long as the recipes are created with care (you can't really substitute different flours without knowing their properties really well). The recipes in Good to the Grain are supposed to be fantastic, and I'm excited to finally have a copy of the book.

Yesterday I baked a batch of the whole wheat chocolate chip cookies. I had a craving for sweets and figured I'd see how the whole wheat cookies compared to my favorite chocolate chip cookie recipe. This is the only cookie recipe I've tried that uses cold butter for creaming with the sugar instead of room temperature. I'm sure there's a good reason for that, though I don't know what it is. But it doesn't really matter - the cookies are great! They are sweet and chocolatey, nice and chewy in the middle but crisp at the edges, just the way I like. You should make these, and not because they are made with whole wheat. They're just really good chocolate chip cookies.

Whole wheat chocolate chip cookies
Adapted from Good to the Grain
Makes about 22 cookies

3 cups whole wheat flour
1 1/2 tsp baking powder
1 tsp baking soda
1 1/2 tsp kosher salt
2 sticks (8 ounces) cold unsalted butter, cut into 1/2-inch pieces
1 cup dark brown sugar
1 cup white sugar
2 eggs
2 tsp vanilla extract
8 ounces good-quality bittersweet chocolate, roughly chopped into small (1/4 - 1/2-inch) pieces

Place racks in the upper and lower thirds of the oven and preheat to 350 deg F. Line two baking sheets with parchment paper.

Sift flour, baking powder, baking soda, and salt into a large bowl. If there are bits of grain or salt that remain in the sifter at the end, pour those into the bowl as well. Using a stand mixer with the paddle attachment, cream the butter and sugars together at low speed just until they are blended, about 2 minutes. Add eggs one at a time and mix each until they are combined. Add vanilla and mix until combined. Add the flour mixture and mix until just combined, about 30 seconds. Scrape down the bowl and add all of the chocolate. Mix until chocolate chunks are evenly distributed throughout the dough and then transfer the dough onto a work surface. Use your hands to mix and make sure all ingredients are fully incorporated (sometimes the stand mixer doesn't completely mix the stuff at the bottom of the bowl).

Scoop balls of dough (about 3 tbs in size) onto the baking sheet, with about 3 inches between them (you'll fit about 6 on each sheet). Bake cookies for 16-20 minutes, rotating pans top to bottom and front to back halfway through, until the cookies are evenly golden brown. Transfer cookies to a rack to cool and repeat with remaining dough.

Note: If you want to save some cookie dough to bake later, you can scoop it out and refrigerate the balls of dough for about a week (wrapped in plastic). You can also freeze the balls of dough on a tray until firm and then transfer them to a freezer bag.

Tuesday, March 15, 2011

Whole wheat pita bread


I bought some halloumi cheese over the weekend, planning to grill it with some lemon and garlic and eat it with pita bread. But then I realized that we were all out of pita, so like any normal person would do, I decided to make some myself instead of going out to the store. Granted, the bread took close to 3 hours to make, while a grocery trip would have taken less than 30 minutes...but I spent most of the 3 hours watching TV, since most of the bread-making process is waiting for the dough to rise. And as a bonus, I got a little arm workout kneading the dough, which is better than the weight lifting that generally occurs only in my imagination.

I really enjoyed making this bread. The dough is smooth and easy to work with, and it's really fun watching the bread puff up in the oven. The pockets in pita are formed by the air that is trapped inside the bread - you don't actually have to form or cut the pockets. I thought that was super cool. Oh, and also, the pitas are delicious!


Wednesday, December 22, 2010

Sweet potato and black bean empanadas


This is the time of year when most food bloggers are posting recipes for cookies or other sweets. But since I've already found a winning holiday dessert recipe for this year, I'm going to do something a little different and tell you about these empanadas. They're delicious and fun, and they keep really well, which means you can enjoy the leftovers for lunch for a few days. Sure beats the usual soup or sandwich. Besides, you need something to eat between all those Christmas cookies, right?

Sweet potato and black bean empanadas
Adapted from Cooking Light, December 2010
Makes 10 empanadas, 2 empanadas make a good dinner serving

9 ounces (2 cups) all-purpose flour (I substituted white whole wheat flour for half of this)
3/4 tsp kosher salt
1/3 cup canola oil
1/4 cup cold water
1 tbs cider vinegar
1 large egg, lightly beaten
1 tbs cumin seeds
1/4 tsp hot smoked paprika
3/4 tsp chili powder
1 cup mashed cooked sweet potatoes
1 cup canned black beans, rinsed and drained
1/3 cup chopped onion
1 large garlic clove, minced
2 tbs chopped fresh cilantro
1/2 tsp kosher salt
1 egg white, lightly beaten

Combine flour and 3/4 tsp salt in a large bowl and mix together with a whisk. In a medium bowl, combine canola oil, water, vinegar, and egg. Slowly add oil mixture to flour mixture, mixing until just moist. Turn dough onto a work surface and knead until smooth. Form dough into a ball, wrap in plastic wrap, and refrigerate for 1 hour.

Preheat oven to 400 deg F. Toast cumin seeds in a medium saucepan over medium heat for 1 minute, stirring. Grind toasted cumin seeds in a mortar and pestle or spice grinder. In the same saucepan used for cumin, heat 1 tbs olive oil over medium heat. Add onion and cook until golden, about 5 minutes. Add garlic and cook for 30 seconds longer. Remove pan from heat. Combine cumin, paprika, chili powder, sweet potatoes, black beans, onions, garlic, cilantro, and 1/2 tsp salt in a large bowl and mash with a fork until well combined.

Divide dough into 10 equal portions, and shape each into a ball. Working with one ball at a time (keep remaining dough covered), roll dough out into a 5-inch circle on a lightly floured surface. Add 3 level tablespoons of sweet potato mixture to the center of the circle. Brush egg white around the rim of the dough, and fold dough over filling into a half moon shape. Pinch edges together to seal. Place empanadas on a large baking sheet coated with spray oil. Make 3 diagonal slashes on the top of each empanada using a sharp knife. Bake at 400 deg F until lightly browned, 16-20 minutes.

Cooked empanadas keep very well for a few days in the fridge.

Thursday, December 16, 2010

Butternut squash galette


I'm finally back to blogging! Sorry that I haven't posted in a while - Andrew and I were in India for a couple weeks, and then I had to go out of town again for a conference. I probably don't need to tell you that we ate really well in India - between the home-cooked meals and a few nights eating out, we got to try cuisine from several regions of the country. Everything was sooo delicious! I'm really looking forward to cooking more Indian food at home now, so you can expect some posts on that theme in the future.

But for today, I'm going to tell you about this butternut squash galette, which would make a nice vegetarian addition to a holiday meal. Unsurprisingly, there is a very limited selection of locally grown vegetables available in Boston during the winter (maybe Three Seasons of Food would have been a better blog title?). Butternut squash is one of the few things that is still readily available, and I was determined to make a main course with it. I came across a butternut squash galette recipe that was originally published in the February 2009 issue of Gourmet, and modified it a bunch, with some inspiration from Smitten Kitchen. I was really happy with the result - the filling is nice and savory, and the crust was easy to make and shape. This was my first time making a galette, and I enjoyed the free-form nature of the crust - way easier to make than a tart or quiche. I'm looking forward to experimenting with more galette fillings in the future.


Sunday, October 17, 2010

Peanut butter banana bread


I have always loved peanut butter. As a kid, I would only eat the chunky kind, and later on switched to the creamy camp, where I still am now. I even remember trying peanut butter soup on a family vacation once. Bananas, on the other hand, I never really liked until a few years ago. It turned out that all it took to change my mind was smelling bananas one morning when I was very, very hungry. I started craving them immediately that day, and still enjoy them now. It's strange how tastes can change so quickly.

Once I started eating bananas more often, I quickly discovered how good the combination of peanut butter and bananas is. So when I saw this recipe for peanut butter banana bread in the October 2010 issue of Cooking Light, I couldn't believe that I hadn't thought of it before! I knew it was going to be delicious, and it didn't disappoint. The peanut butter adds a nice nutty flavor, and the peanut pieces add good texture. Regular banana bread is good, but I think this is even better!

Obviously bananas are not local to MA, but this is one of those recipes that I wanted to post about anyway. As for modifications, I used white whole wheat flour instead of all-purpose, like I always do for quick breads. I also substituted 1/2 cup applesauce for some of the banana, since I didn't have enough banana around. It worked out really well - the bread still tasted like banana (not apple), but the banana flavor wasn't too strong. I'll probably do the same thing next time. Finally, the original recipe also included a peanut butter glaze, but I left that out - I knew the glaze wouldn't store or freeze well. 


Thursday, October 14, 2010

Sandwiches


I like a good sandwich as much as the next person, but for me, sandwiches fall squarely into the lunch food category, not dinner food. I'm not sure why, since I consider burgers and quesadillas to be perfectly acceptable for dinner, and they're basically sandwiches...But in any case, I've started to rethink my position on sandwiches this week. Andrew and I were out of town for the long weekend and arrived back home late Monday night to an empty fridge. I haven't had time to do any grocery shopping since, so we've been making do with staples and freezer stock, as well as a loaf of bread and some apples that I picked up at the farmers' market near my office. Sandwiches have been on the dinner menu twice this week, and since our kitchen is always stocked with things like bacon, olives, and cheese, we've been able to make some pretty good ones.

With this post, I just wanted to give you an idea of some of the sandwiches that we're been making with the ingredients that we tend to keep around. We had bacon, apple, and cheddar sandwiches yesterday, and today I made an olive and tomato spread that went pretty well with grilled cheese (I had some slow-roasted tomatoes in the freezer, which came in handy). These recipes I've given aren't meant to be strict, and you should adjust the ingredient amounts to your liking.

What about you? Do you like to eat sandwiches for dinner? What are your favorite kinds to make?


Sunday, September 26, 2010

Grandma's hermit bars


My sister-in-law threw me a lovely bridal shower last spring. Knowing my fondness for cooking, she asked all the guests to contribute a favorite recipe, and compiled them into a little book for me. It was such a thoughtful gift! I love flipping through it, not only for the recipes, but also for the memories and connection to family and friends.

Have you ever heard of hermit bars? I tasted them for the first time a year or two ago at Andrew's grandmother's house, and I was excited that she contributed the recipe for my shower. They're kind of cakey in texture, humble and homey in spirit, and filled with raisins and spices. The flavors are perfect for fall. I'm not sure how they got their name - if you know, please share!

I didn't change much in this recipe, except to use white whole wheat flour instead of all-purpose (as usual), and a combination of brown and white sugar instead of all white. The hermits came out great - perfect for an afternoon snack (and mid-morning snack, and dessert, and breakfast...)


Tuesday, September 7, 2010

Zucchini sweet potato bread


This is my favorite quick bread recipe, and happily, both zucchini and sweet potatoes are in season right now! I first came across this recipe on Joy the Baker, and I've modified it to use white whole wheat flour, and also cut down on the sugar, because I don't like quick breads to be too sweet. This bread is hearty, moist, and flavorful, and makes a great breakfast...or afternoon snack...or dessert. And though I wouldn't exactly call it healthy, I think wholesome is an appropriate description. Enjoy!


Sunday, August 29, 2010

Corn fritters with roasted tomatoes and peppers


It's almost fall. Winter squash, brussels sprouts, and apples are appearing at the farmers' market, which means the summer vegetables are on their way out. I love fall in Boston, especially the weather, foliage, and back-to-school season energy, but I'm really going to miss summer produce. I better enjoy it while it lasts...

I had frozen a few cups of fresh corn kernels a couple weeks ago, and decided to use them to make these fritters for a light Saturday afternoon lunch. The recipe came from the September 2010 issue of Cooking Light, and I'm submitting this post to Tina, who is guest hosting this week's Magazine Mondays. The fritters were a hit - both Andrew and my sister, who just moved to Boston (yay!), loved them.

I made quite a few changes to the original recipe: I used white whole wheat flour instead of all-purpose in the batter, and added lime zest and smoked paprika. I served the corn fritters with roasted tomatoes and Anaheim chile peppers, and left out some of the accompaniments that the original recipe suggested, mostly due to lack of ingredients. I think these fritters would be stellar with some avocado and bacon as well. The last major change I made was to do the roasting at a higher temperature than the original recipe instructed - this allowed the pepper skins to brown and blister, and made the tomato roasting go quicker.


Monday, July 26, 2010

The simplest bread

This is the simplest bread recipe I have baked: total of 4 ingredients - flour, yeast, salt, and water. I complicated things a bit by making it partially whole wheat, because I have a tendency to do that, but it's still pretty easy. You get two loaves out of this, so lots of payoff for the effort!

Simple wheat bread
Adapted from here on Joy The Baker.
Makes 2 loaves

2 cups bread flour
2 cups whole wheat flour
2 teaspoons active dry yeast
2 teaspoons salt
1 1/2 cups warm water

Reserve 1/4 cup of whole wheat flour, and place the remaining 3 3/4 cup flour in the bowl of a stand mixer fit with a paddle attachment. Add the salt and yeast, and pour in the warm water. Mix on low speed until the dough just comes together.

When the dough comes together in a mass, switch to the dough hook and mix on medium speed for 2 minutes. Dough should clear the sides but may stick to the bottom a bit. If the dough feels too sticky or too dry, add a bit more water or flour by the tablespoonful. After 2 minutes, let the dough rest for five minutes.

After the five minute rest, knead the dough again for 3 minutes on medium speed (I did this step for 5-6 minutes, just because the dough didn't look ready after 3). Place the dough on the counter and, using the 1/4 cup of whole wheat flour that was reserved in the beginning, hand knead the dough. You may not need to use the whole 1/4 cup, just knead until the dough feels firm and solid. Form dough into a smooth ball.

Place the dough in a lightly oiled bowl, and turn the dough over to coat the entire dough lightly in oil. Cover with plastic wrap and a kitchen towel and place in a warm spot to rest for 1 1/2 hours. The dough should double in size. Remove from the bowl, punch down and reform into a ball. Return to the bowl, cover and allow to rest for another 30 minutes.

Here's what mine looked like before and after the 1 1/2 hour rest:

After the second rest, place the dough on a lightly floured surface and cut into 2 equal pieces. Form each piece into a smooth, round ball, tucking any rough edges underneath the dough. Cover with a damp cloth and leave to rest on the lightly floured surface for about an hour.

During the resting period, preheat the oven to 450 degrees F. Place a baking rack in the lower third of the oven and leave either a baking stone or an upside down baking sheet in the oven to preheat as well. I didn't have a baking stone when I made this, so I used a cookie sheet.

Just before the loaves are set to go in the oven, slash the top of the loaves with 2 slashes, like in the picture below, using a sharp knife. Remove the hot baking sheet or stone from the oven. Carefully transfer the dough onto the baking sheet or stone and return to the oven. (Now that I think about it, if you are using a stone, it might be difficult to remove it from the oven because of its weight. In that case, it might be easier to pull out the oven rack and carefully put the loaves on the stone.)

After you put the bread in the oven, take 1/4 cup of water or a couple ice cubes, open the oven, quickly throw the water or ice onto the oven floor and immediately close the oven door. You want to keep the steam in the oven. Wait 2 minutes and repeat the process.

Bake loaves for 20-25 minutes. They should be golden brown and should measure 190-210 degrees F in the middle.

Let bread cool completely on a rack before eating. The crust is great the first day, and if you store it for longer, a light toast is nice.