Showing posts with label peaches. Show all posts

Thursday, September 15, 2011

Peach butter

IMG_1261_v2

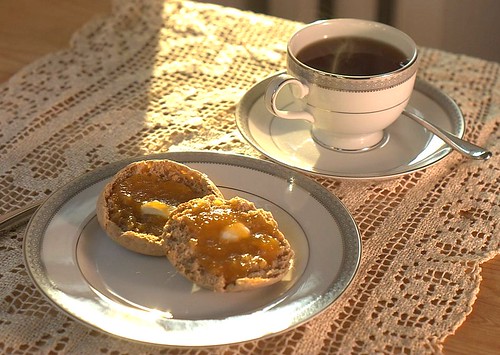
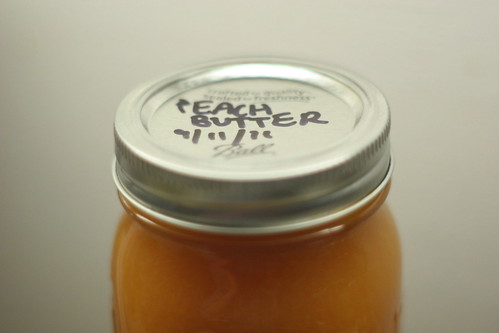
Last week I was reminded that one of my goals for my second year of blogging is to make preserves, and that the time to preserve summer fruit is quickly running out. I've made preserves in the past but I never got around to it last summer, and I didn't want to miss my chance again this year. Luckily, I had a pretty free weekend with plenty of time for a couple canning projects. I decided to focus on peaches first and ended up choosing a peach butter recipe from the Ball Complete Book of Home Preserving (in case you are wondering, this does not contain any actual butter - the "butter" in the name comes from the soft, smooth texture of the finished spread). It's a delicious spread with pure, summery peach flavor. Perfect stirred into yogurt or spread onto English muffins. I know these jars are going to be a real treat in the middle of winter!

IMG_1169

I know canning can be intimidating if you've never done it before, so I'm going to include fairly detailed information and instructions here. It is time consuming, but it's not difficult, and I encourage you to give it a try! I highly recommend the Ball Complete Book of Home Preserving if you are interesting in canning - it has detailed information about how canning works, and hundreds of really great recipes for jams, salsas, sauces, relishes, pickles, fruit in syrup, condiments, and more.

The basic idea behind canning is that in order to keep food from spoiling, you need to make sure that it is free of microorganisms (bacteria, molds, yeasts), and that no microorganisms can get in. To do this, the filled jars are put in a boiling water bath long enough to kill any microorganisms that might be present. Then, when the jars are removed from the bath and cool down, gases are released from the jar, which creates a vacuum seal.

The boiling water sterilization method is only valid for high-acid foods (pH of 4.6 or lower). For low-acid foods, a pressure canner must be used to ensure safety. Because of this, be very, very careful if you want to alter a canning recipe. You need to make sure that the alterations do not change the acidity of the food.

One last note: make sure you use fresh, good-quality fruit. Cut out any bruised areas and do not use overripe fruit. 

Canning equipment:
1. Jars with flat lids and screw bands - I always buy regular mouth Ball Mason jars.
2. Canner - I don't have a real canner and just use a large stockpot.
3. Rack to keep the jars off of the bottom of the canner, allowing water to flow underneath the jars - I use the steamer rack from my rice cooker. Another idea is to tie a bunch of extra jar screw bands together until they cover the bottom of the pot.
4. Jar lifter - this is one thing that I recommend buying. A real jar lifter makes it much easier to get the hot jars out of the boiling water. You could try using tongs, but it's tricky (I speak from experience. A broken jar experience, to be specific).

That's all you need! Any other equipment (funnels, magnetic lid lifter, etc.) is strictly optional. Let me know if you have any questions!

Have you ever tried canning? What are your favorite things to preserve?

Sunday, August 22, 2010

Peach frozen yogurt


This one doesn't require much explanation: peaches + yogurt + sugar + ice cream maker = perfect summer dessert. This has a nice clean peach flavor, and isn't too sweet. And because the amount of sugar in each serving is low, it's actually pretty healthy.

This frozen yogurt is best eaten on the day it is made. I stuck mine in the freezer for about 2 hours after making it, and the texture was perfect at that point. It gets very hard (impossible to scoop) if you store it in the freezer for more than a few hours - if you want to eat it after that point, you need to take it out of the freezer for about 10 minutes so that it softens enough to scoop. It will definitely still taste good, but the texture will be a bit icier than on the first day. In any case, if you make it for a small group, I'm sure you won't have any problem finishing it on day 1!


Tuesday, August 17, 2010

Peaches baked with blue cheese


This week's Summer Fest theme is stone fruit, and I'm really excited about it - the peaches, plums, and nectarines in the market right now are just phenomenal! I knew right away that I didn't want to make a standard dessert with stone fruit - I really wanted to experiment with something more savory. I finally remembered an appetizer that Andrew and I had at Maggie's Restaurant during our honeymoon in Bar Harbor, Maine. It was a simple dish of grilled peaches with blue cheese, yet the flavors were surprisingly complex. It was the perfect start to that summer meal, and we both loved it. I'm so glad I decided to recreate this dish for Summer Fest...it brought back so many memories of that wonderful trip!

This dish is super easy to put together, and I think it would work as an appetizer or a dessert, although I prefer it as an app. You do need to use a good quality aged balsamic vinegar for this, something sweet and balanced, definitely not overly acidic or harsh. (I actually used a balsamic vinegar that we bought during our honeymoon, which was very fitting). And for those of you who have the appropriate equipment, these peaches would be even better grilled...


Peaches baked with blue cheese
Inspired by Maggie's Restaurant
 
For each serving:
1 peach, quartered, with pit removed
1 tsp balsamic vinegar
A few thin slices of blue cheese

Special equipment: small ramekins

Preheat oven to 400 deg F.  For each serving: Place 4 peach quarters in the ramekin, skin side down, and sprinkle with 1 tsp balsamic vinegar. Top with blue cheese and bake in preheated oven for 10 minutes, or until cheese is soft and just beginning to brown. Let cool for about 5 minutes before eating.